Online Photography School
Increase Depth Of Field In Macro Photography

Creating a deep depth of field when you’re shooting macro photography is nearly impossible, even when using small apertures such as f/22. This can be frustrating if you want your subject to appear completely sharp from front to back. There is, however, a cunning solution to this problem: focus stacking. By using a combination of camera technique and careful photo editing you can expand the depth of field and get super-sharp results every time.
The best way to think of this process is that it’s a little like merging different exposures together to get an image with a full range of tones. However, in this case you are actually using a sequence of differently focused images to get a final image that’s sharp throughout.
This technique is not nearly as complicated as it sounds, so let’s take a look at how it’s done, by following the three easy steps on the right. All you need is an SLR and Photoshop.

01 Keep it steady
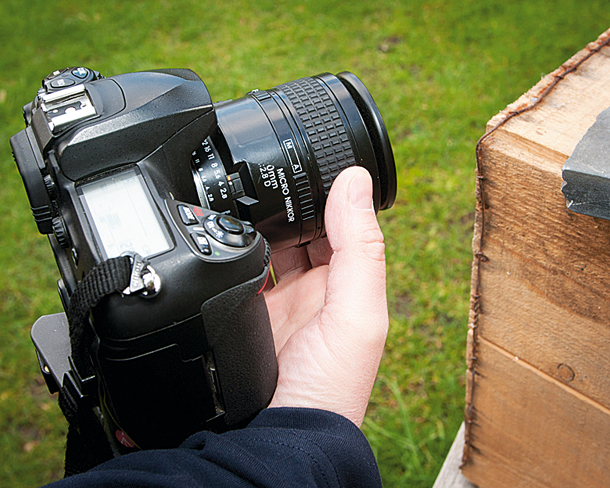
A sturdy tripod is essential. Switch to Manual mode and set the focus to MF. Now focus on the point closest to the camera that you want sharp. Take multiple shots, each time moving the focus ring a little until you have well-focused shots of each point.

02 Open your shots
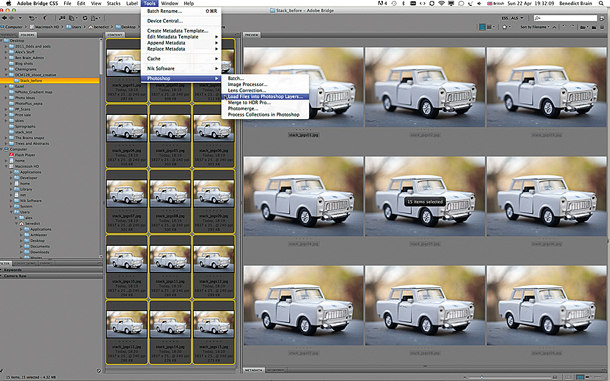
Open Adobe Bridge and browse to your images – we’ve taken 15 in total. Select all the images and go to Tools>Photoshop>Load Files into Photoshop Layers. It’s a good idea to process your raw files and save them as JPEGs, otherwise your computer may struggle.

03 Try Auto Blend
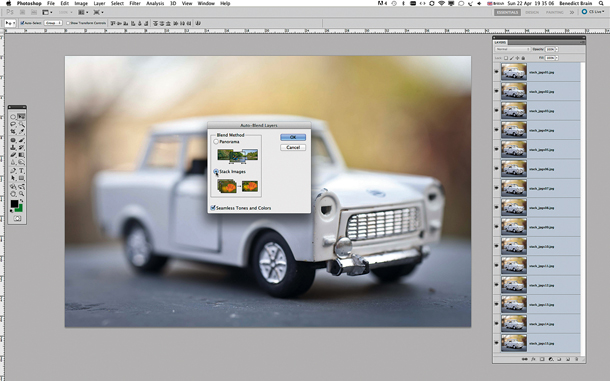
When your file is open in Photoshop, you’ll see all the images are loaded as individual layers. To blend the sharp bits, go to Edit>Auto Blend. In the new window that appears, select Stack Images and ensure Seamless Tones and Colours is checked.
Let us know what do you think about the article in comments section below. If you like the article then make a effort to share.

0 comments:
Post a Comment