Online Photography School
Macro Splashing Rose Photography

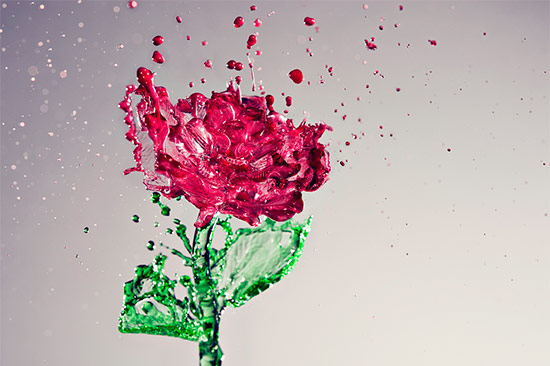
Nothing could be more fitting than the title “A Splash Of Rose” for this image by Anthony Chang, a student photographer with a brilliant eye for creating the unusual.
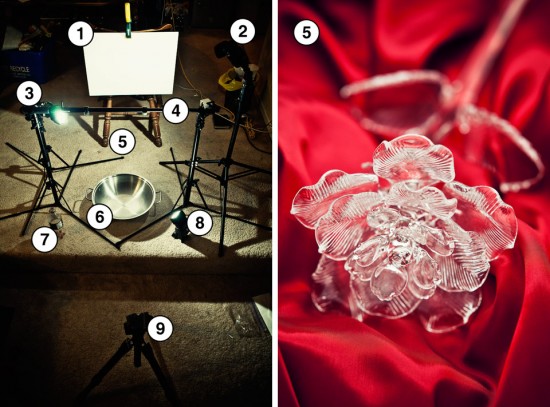
Armed with a glass rose, a plastic water bottle, a wok to catch the water and a white card for the background, Anthony got to work. He set up a small old monopod wrapped in bungee cords to hold it to light stands, then suspended the glass rose, adhering it with hot glue.
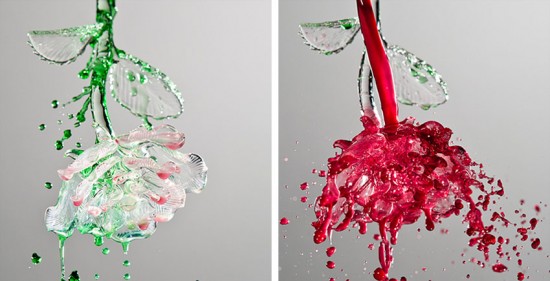
Anthony says he purchased the glass rose as a base from which to bounce water for the shot. He added food coloring to water to achieve the perfect colors, then utilized Photoshop to combine various photos and attain the final image. The green stem and leaves are made up of six photos and the flower itself is made up of 11 different photos, so it’s a 17-shot composite. Another note to mention is the fact that this photo was taken upside down, so the water looks like it’s flying upwards.

Set Up
| 1. Large white card as a background
2. Nikon SB-80dx bare, aimed at the white blackground, firing at 1/64 power |
3. Nikon SB-800 bare, firing at 1/64 power
4. Monopod on which the rose was suspended. |
5. Glass rose, glued on upside down
6. Wok 7. Plastic bottle to pour water |
8. Nikon SB-800 bare, firing at 1/64 power
9. Sony DSLR-A900 on a tripod |
Anthony points out another secret to capturing these types of images is using a matching flash. “The Nikon SB-800 and SB-80DX are actually the same flash internally, but cosmetically different. It’s very important to use the same flash models and power for this work because every flash has a different flash duration. My SB-28 at 1/64 power has a flash duration of 1/28800 seconds, unlike my SB-800/80DX which has a duration of 1/32300 seconds. That difference in flash duration will cause a ghosting effect that is unwanted.”
Knowledge of Photoshop is also helpful when merging 17 photos together as Anthony did for this image. “I did it in two parts,” he explains, “one for the red and one for the green. I took the six best shots for the red and put them all in one Photoshop file. I selected all six photos and went to edit, then used Auto-Align Layers command, which automatically aligns layers based on similar content in different layers. This doesn’t always do a great job, but it sometimes works pretty well. If it’s off, you have to zoom in and fix it manually by nudging each layer up, down, left or right.”

“Once I did that, I picked out my base layer and then selected the other five layers, created a layer mask for each of them and revealed the parts I wanted from each photo, saved the result and did the same for the green part, that is, the stem. Once that was done I combined the two files together and there you go.”
Despite being a somewhat messy shoot, Anthony says he had a blast. “It was expensive with the $80 glass rose,” he remarks, adding, “I was pretty worried that it would fall and break during the shoot but, luckily, it didn’t.”
All Images in this article © Anthony Chang
Author:
Jeremy Hooks
Let us know what do you think about the article in comments section below. If you like the article then make a effort to share.

0 comments:
Post a Comment